Reviewed by Thomas Okafor, Peptide Chemist · Updated October 2026
A peptide COA (certificate of analysis) is the lab report behind a research peptide. When it’s genuine, it tells you which compound a batch holds, how pure it is and who tested it. When it’s been edited or borrowed from another product, it tells you nothing at all, and both kinds look the same at a glance.
That’s the awkward part of buying research compounds online. Almost every seller posts a COA, and most buyers glance at the big purity number and move on. A 2026 preprint that pooled thousands of independent test results found wide swings in purity and measured amounts across products sold directly to consumers (Mendias and Awan, 2026), so the paperwork deserves a closer look. This guide shows you how to read a COA line by line, how to confirm it with the lab, and how to catch a fake.
What Is a Peptide COA?
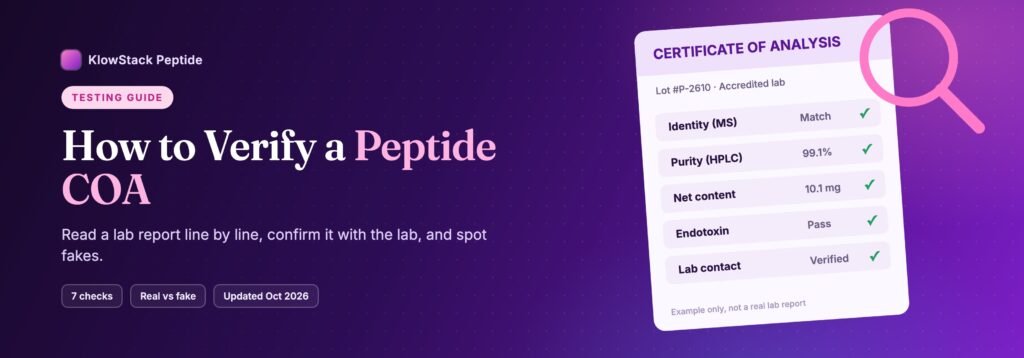
A peptide COA is a laboratory document reporting test results for one specific production batch of a peptide. It normally confirms the compound’s identity (usually by mass spectrometry), its purity (usually by HPLC), the batch or lot number, the test date and the lab that ran the analysis.
Two kinds of labs issue them: the manufacturer’s own quality lab (in-house testing) or an independent third-party lab. Both can be legitimate, though an outside lab carries more weight because it has no stake in the result.
Every COA belongs to a single batch. Peptides are made in production runs, and small differences between runs are normal, so a report from March tells you about the March batch only.
What does the COA number mean? It’s the lab’s reference for that report, sometimes called a report ID, sample number or task number. It’s the single most useful line on the page, because it’s what the lab uses to look the report up when you ask whether it’s real.
How to Read a Peptide COA, Section by Section
Read a COA top to bottom in the order a lab prints it: the header (who tested it and when), the sample details (what was tested), the HPLC purity result, the mass spec identity check, and finally the signatures and verification code that tie the document back to the lab.
Header: lab name, report number, dates
The top block names the lab, its address and the report number. Look for two dates: when the lab received the sample and when it finished testing. A real lab prints a physical address and contact details you can find elsewhere online. A logo with no street address is the first thing to question.
Sample details: compound, CAS number, batch/lot number
This block says what was tested. You’ll see the compound name, often a CAS number (a unique registry number chemists give each substance), the batch or lot number, the client’s name and the amount sent. The batch number is the bridge between the report and your vial, so it has to match the label exactly, character for character.
HPLC purity result
HPLC (high-performance liquid chromatography) pushes a dissolved sample through a packed column, separating the compounds so each shows up as a peak on a graph. Purity is the main peak’s share of all the peaks, written as a percentage. A result of 99% means the target peptide made up about 99% of what the instrument detected. Our peptide purity guide covers what different percentages mean in depth.
Mass spec identity check
HPLC tells you how clean a sample is. Mass spectrometry tells you what it is. The instrument weighs molecules and reports a mass in daltons (Da), which the report lists beside the expected value for that peptide. A close match is strong evidence the right compound is in the vial. A purity figure with no identity test can describe a very clean sample of the wrong thing.
Signatures, accreditation and verification code
At the bottom you’ll usually find an analyst’s signature, sometimes an accreditation logo such as ISO/IEC 17025, and on newer reports a QR code or verification key. That code is your shortcut to proving the document is genuine, which the next section walks through.
How to Verify a Peptide COA in 7 Steps
To tell whether a peptide COA is real, match the batch number to your vial, confirm the compound and CAS number, check the dates, read the HPLC result and chromatogram, compare the mass spec value with the expected weight, confirm the lab exists independently, and then verify the report with the lab directly.
1. Match the batch number to your vial label
Start with the label on the vial or box. The lot number there must appear on the COA exactly. If the seller sends a report for a different batch, or a “sample COA” with no batch at all, you’re looking at someone else’s results. Ask for the report that matches your lot, and keep a photo of the label so you always have the number handy.
2. Confirm the compound name and CAS number
Check that the compound named on the report is the one you ordered, including its exact form. Look up the CAS number in PubChem, the National Institutes of Health’s free chemistry database. Mismatches happen more than you’d think, especially with peptides that go by several names or come as fragments of larger proteins.
3. Check the test date against when the batch was made
A test date should fall after the batch was produced and before it went on sale. A report dated years before the product launched can’t describe it. A date in the future is an obvious problem. Very old reports for a product still being sold suggest the same document is being reused across new batches.
4. Read the HPLC purity and look at the chromatogram
Find the purity percentage, then look at the graph itself. A real chromatogram has a tall main peak, a few small ones, axis labels and a retention time (when the peak appeared). A report that shows a percentage with no chromatogram gives you nothing to check. Compare the graph with the seller’s other COAs, too, since identical graphs on different products are a classic sign of copying.
5. Check the mass spec result against the expected weight
Look up the peptide’s expected molecular weight in PubChem and compare it with the “found” or “observed” mass on the report. Small differences are normal. A mass that’s far off, or a missing identity section, means the report hasn’t confirmed what the vial holds.
6. Confirm the lab is real and independent
Search for the lab’s name in a fresh browser tab. Look for a website, a street address, a phone number and some history. If the report claims ISO/IEC 17025, the international standard for testing-lab competence, look the lab up in the accrediting body’s public directory. Check whether the lab is owned by the seller, too.
7. Verify the report with the lab directly
This is the step that settles it. Scan the QR code or enter the report’s verification key on the lab’s own site, or email the lab with the report number using contact details you found yourself. If the lab’s copy matches yours, the document is genuine. If the lab has never heard of it, you have your answer.
Red Flags of a Fake Peptide COA
The clearest red flags on a fake peptide COA are a missing batch number, a lab you can’t find, the same chromatogram on different products, signs of PDF editing, a “100% purity” claim, no mass spec section, and test dates that are years old or in the future.
- No batch or lot number. A report that isn’t tied to a batch can’t describe yours.
- A generic or missing lab name. “Tested in an independent lab” with no name, address or report number is a claim with nothing behind it.
- The same chromatogram across products. Every compound produces its own graph. Matching peaks, noise and retention times on two products mean one document was copied.
- Edited PDF details. Mismatched fonts, numbers that drift slightly off the line, blurry patches around key figures, or file metadata showing editing software and a creation date long after the “test date.”
- “100% purity.” Real HPLC results almost never reach a perfect 100%. Most genuine reports land somewhere in the high 90s.
- No mass spec result. Purity without identity leaves the most basic question unanswered.
- Old or future test dates. A report older than the product, or dated next month, doesn’t fit the batch.
- A verification code that goes nowhere. A QR code that opens the seller’s own website, or a key the lab’s system doesn’t recognize.
Editing a PDF takes minutes, which is why the lab check in step 7 beats any amount of squinting at fonts.
Real vs Fake COA: Quick Comparison Table
The table below puts the eight checks side by side. Use it as a fast screen before the lab verification. If a COA fails two or three rows, treat the product as unverified.
| Check | Real COA | Likely fake or unreliable |
|---|---|---|
| Batch number | Matches your vial exactly | Missing, generic or for another lot |
| Lab details | Named lab with address and contact info you can find independently | Logo only, no address, or a lab you can’t find |
| Chromatogram | Present, labeled, unique to the compound | Missing, or identical to another product’s graph |
| Mass spec | Observed mass listed next to expected mass | No identity test at all |
| Dates | Received and tested dates that fit the batch | Years old, or in the future |
| Verification code | Lab’s own site confirms the report | Code missing or links back to the seller |
| Accreditation | ISO/IEC 17025 claim listed in the accreditor’s directory | Logo with no matching listing |
| Purity claim | A realistic figure such as 98.6% or 99.2% | A round “100%” |
HPLC Purity vs Net Peptide Content
HPLC purity and net peptide content measure different things. Purity is the target peptide’s share of the peptide material in a sample. Net peptide content is how much of the powder’s total weight is actually peptide, once water and salts are counted. That’s why a 10 mg vial can test anywhere from about 8 to 10.5 mg and still be legitimate.
Freeze-dried peptide powder holds more than peptide. Peptides are usually made as salts, often with acetate or trifluoroacetate (TFA) attached as counter-ions, and the powder also holds onto a little water. HPLC with UV detection doesn’t see those extras, so a sample can read 99% pure while the peptide itself makes up a smaller share of the weighed powder.
Content testing answers a different question: how many milligrams are in the vial? A result a little under or slightly over the label is common and comes down to filling accuracy and what the label counts. A vial reading half its stated amount is a different story. Our peptide purity guide breaks this down with worked numbers.
How to Check a COA With the Testing Lab
The most reliable way to check a COA is with the lab that issued it. Scan the QR code or enter the verification key on the lab’s own website, or email the lab with the report number using contact details you found independently. You can also confirm an accreditation claim in the accrediting body’s public directory.
Many labs that test research peptides now print a verification key or QR code on every report, which pulls up the original result on the lab’s own site. When there’s no code, an email works: send the report number and ask the lab to confirm the compound, batch, date and result.
Two cautions keep this check reliable. First, never use a link or email address printed on the PDF itself, because a fake can point to a fake. Second, check accreditation separately. An ISO/IEC 17025 logo means little until you’ve found the lab in the accrediting body’s listing for the type of testing on the report.
In-house reports can still be useful, but they ask you to trust the seller’s own lab. Third-party reports remove that conflict. Our guide to third-party peptide testing compares the two in detail.
What a COA Can’t Tell You
A COA describes the sample a lab tested, on the day it was tested. It can’t confirm your exact vial, how the batch was stored or shipped afterward, or results from quality tests that weren’t run. Purity and identity reports often leave out endotoxin, heavy metals and sterility, which come as separate tests.
- One sample, one batch. The lab tested a vial or two. Others from the same lot are probably similar, but that’s an assumption.
- What happened after testing. Heat, light and moisture during storage and shipping can degrade a peptide. Our guide to lyophilized vs premixed peptides explains why powder holds up better.
- Tests that weren’t run. Endotoxin testing follows USP chapter <85>, sterility follows chapter <71>, and heavy metals are often tested by ICP-MS. If those sections are missing, the report is silent on them.
Think of a COA like a used-car inspection. It’s valuable and specific, and it describes the car on inspection day.
Reading a COA for a Peptide Blend
A peptide blend COA has to identify and measure every compound in the vial separately. A single combined purity figure can look excellent while one ingredient is missing or underfilled, so a good blend report lists an identity result and an amount for each peptide.
Blends are harder to test than single peptides. The lab has to separate several compounds in one run, confirm each by mass, and measure each amount against the label. Some peptides weigh almost the same, so the report should show them as distinct peaks.
The basic checks above still apply. You’re just running them once per ingredient. Our peptide blend COA guide covers the theory, and the KLOW COA guide works through a four-peptide example with expected values for each compound.
How to Get Your Own Peptide Tested, and What It Costs
Independent testing labs accept a sealed vial by mail and return their own COA. Published US price lists checked in October 2026 put a combined purity, identity and content test at roughly $150 to $400 per sample, with endotoxin and heavy-metal tests usually added at extra cost. Turnaround is typically about one to two weeks.
Sending a sample yourself removes the seller from the process entirely. The usual steps:
- Choose a lab that tests research peptides and check what it offers. Most list HPLC purity, mass spec identity and content (mg per vial) as a standard package.
- Ask about add-ons. Endotoxin, sterility and heavy metals are typically separate line items, and some need an extra vial.
- Send a sealed vial. Most labs want an unopened vial, so the test consumes it.
- Expect a report in about a week or two. Many labs offer paid rush service.
In related searches, Janoshik is the name that comes up most often for this kind of testing. We don’t rank or recommend labs. Whichever lab you use, its report should pass the same seven checks.
Frequently Asked Questions
How much does a peptide COA cost?
For a buyer, a seller’s COA is free to request. Testing a sample yourself costs roughly $150 to $400 for purity, identity and content, based on US lab price lists published in October 2026. Endotoxin, sterility and heavy-metal tests usually cost extra.
How do I get a COA for my peptides?
Ask the seller for the report that matches the batch number on your vial. If you’d rather have an independent result, mail a sealed vial to a testing lab, and it will issue its own COA in about one to two weeks.
How do I check if a peptide source is legit?
Look for batch-specific COAs you can verify with the lab, research-use-only labeling, no dosing or human-use claims, and clear contact details. Our guide to where to buy peptides covers the full checklist.
What does the COA number mean?
It’s the lab’s reference number for that specific report, sometimes called a report ID or task number. Labs use it to look up the original result, so it’s what you quote when you ask a lab to confirm a document is genuine.
Is 98% purity good enough for research?
For many lab applications, 98% HPLC purity is a common minimum, and plenty of research-grade peptides test in the 98 to 99.5% range. The right threshold depends on the experiment. Identity confirmation and content count just as much as the purity figure.
Conclusion
Seven checks separate a real peptide COA from a convincing fake: the batch number, the compound and CAS number, the dates, the HPLC result, the mass spec match, the lab’s independence and, above all, confirmation from the lab itself. Run them once and they become a habit. Every KlowStack product links to its batch COAs, so you can try the checklist on a real report from our home page.
Sources
- Mendias CL, Awan TM. 2026. Evaluation of Research Grade Peptides Marketed Directly to Consumers Reveals Extensive Variability in Purity and Measured Abundance. Preprints (not peer-reviewed). doi:10.20944/preprints202604.1748.v1
- PubChem, National Library of Medicine, National Institutes of Health
- ISO/IEC 17025: General requirements for the competence of testing and calibration laboratories
- United States Pharmacopeia, General Chapters <85> Bacterial Endotoxins Test and <71> Sterility Tests